There are already multiple ways to trigger the adding of a tag, from order forms to LMS checklists to opt-ins. The custom operation add/remove tag feature increases the flexibility, since it allows both user and admin-initiated tag changes at any point inside your membership site/online course area/CRM automation setup.
Common Scenarios
For user-initiated tag changes, the custom operation will display as a button. Once clicked, the tags are added (or removed) as designated, and AccessAlly syncs this information with the CRM.
Admin-Initiated Tag Changes
You can also add the custom operation webhook/HTTP post to initiate the tag change inside a CRM automation.
Some ideas and use cases for this feature include:
- Add a button for the user to indicate whether they’re interested in learning more about a course or topic. Once clicked, they’re tagged and entered into a new CRM automation that’s designed to deliver the relevant information via email.
- Add a “Stop” or “Cancel” subscription button to allow your users to indicate that they wish to cancel a current subscription. (Please note that we do recommend caution when using this setup, since recurring payments are involved.)
- Create a custom operation with multiple permission tags, so that your CRM automations
- Add an “Unsubscribe” button inside your membership site so that a user can remove a marketing or newsletter tag without having to fully unsubscribe from all communications. This is a great way to keep your email list healthy and your clients happy.
Tutorial
Step 1. Add New Operation
Go to AccessAlly > Custom Operations. Then, click on Add New Operation.
Step 2. Create Name & Choose What Operation Will Do
Name the operation something descriptive (like “Add Free Course Access Tags”). Then, under Choose what this operation will do, select the Add / Remove Tag(s).
The customization options will change as follows:
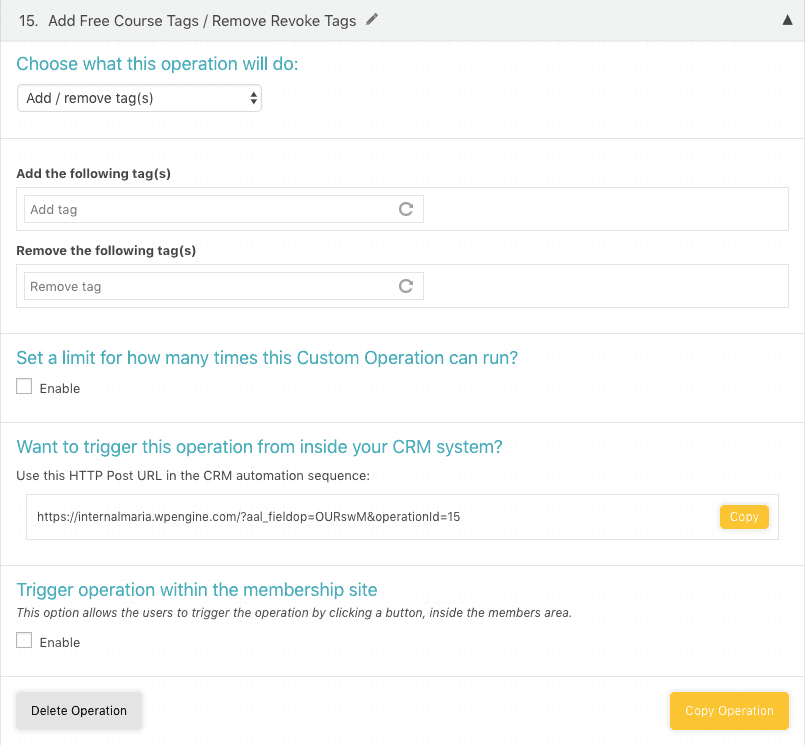
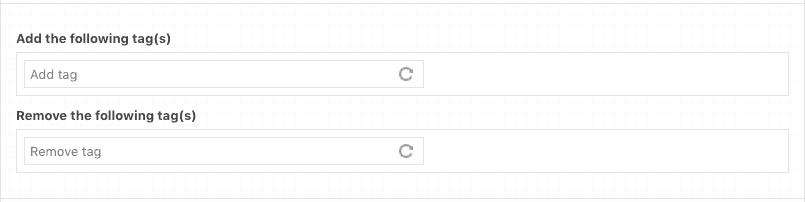
Step 3. Select Tag Changes
The next section will allow you to designate one or more tags to add and/or remove from the user. These tags must already be created inside your CRM system.
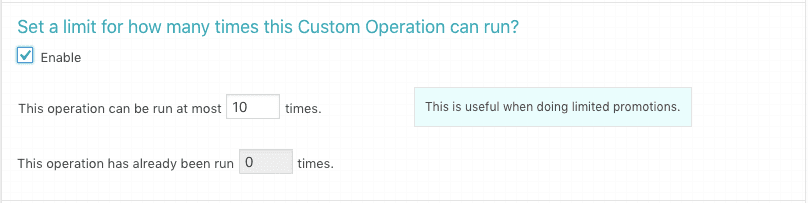
Step 4. Set Limit
Next, you can set a limit on the number of times the custom operation can be run. Leave the box unchecked if you do not need to add a limit.
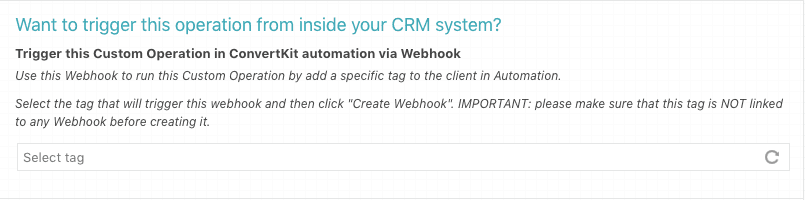
Step 5. Trigger Operation From CRM
To initiate the tag change from within a CRM automation, simply copy the URL listed and add it as a webhook (also called an HTTP post) in your automation.

Since ConvertKit does not allow users to add webhooks to automations, you’ll want to create a unique tag that will ONLY be used when you want this custom operation to take place:
Step 6. Trigger operation within the membership site
If you want your membership site users to initiate the tag changes from the membership site, you can select the box in this section to reveal additional settings:
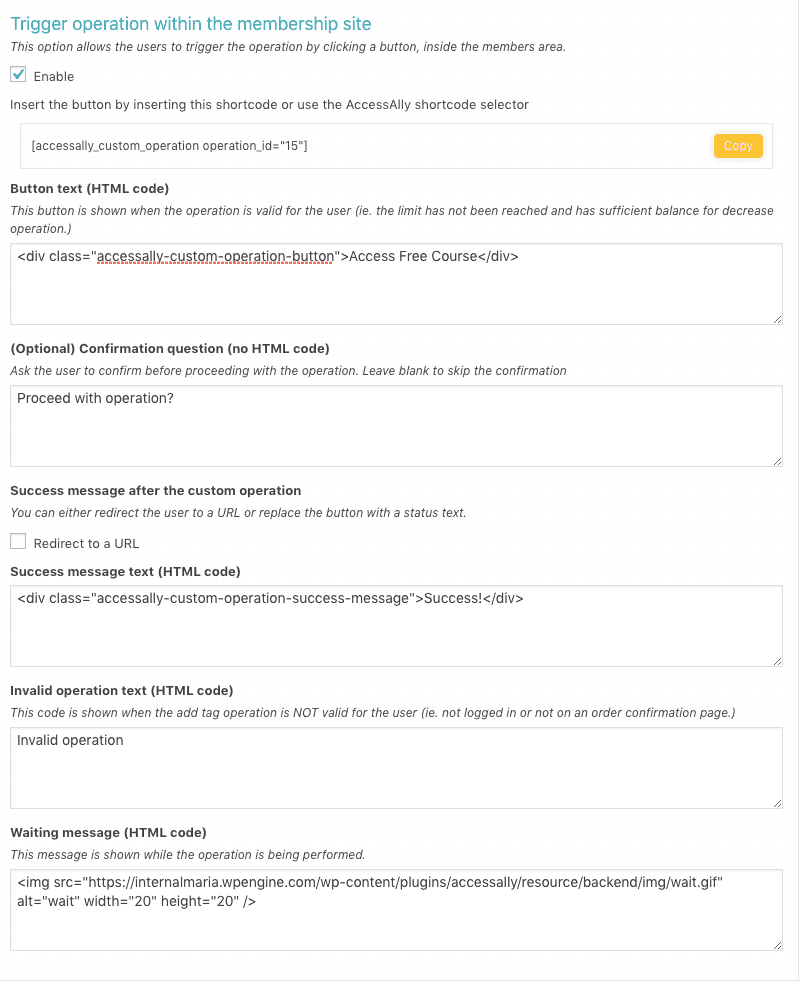
- Button text (HTML code) – It’s a good idea to change the button text so that the user will clearly understand what click the button will accomplish.
- (Optional) Confirmation question (no HTML code)
- Success message after the custom operation – Check the box if you wish to redirect to a URL (thank you or confirmation page), otherwise the confirmation message will show.
- Invalid operation text (HTML code) – This code is shown when the add tag operation is NOT valid for the user (ie. not logged in or not on an order confirmation page.)
- Waiting message (HTML code) – This message is shown while the operation is being performed.
- Limit reached message (HTML code) – If you’ve set a limit in the section above, this message is shown when the operation limit has been reached.
Step 7. Save All Changes
Before continuing, please be sure to save all changes on this page.
Step 8. Initiate Operation
If you would like the operation to be initiated from a user inside the membership site, you can copy the shortcode from Step 6 and add it to your WordPress page.
OR
If you would like the operation to be initiated from a CRM automation, you can create the automation now and add the webhook URL from Step 5.